 Maria Gonzalez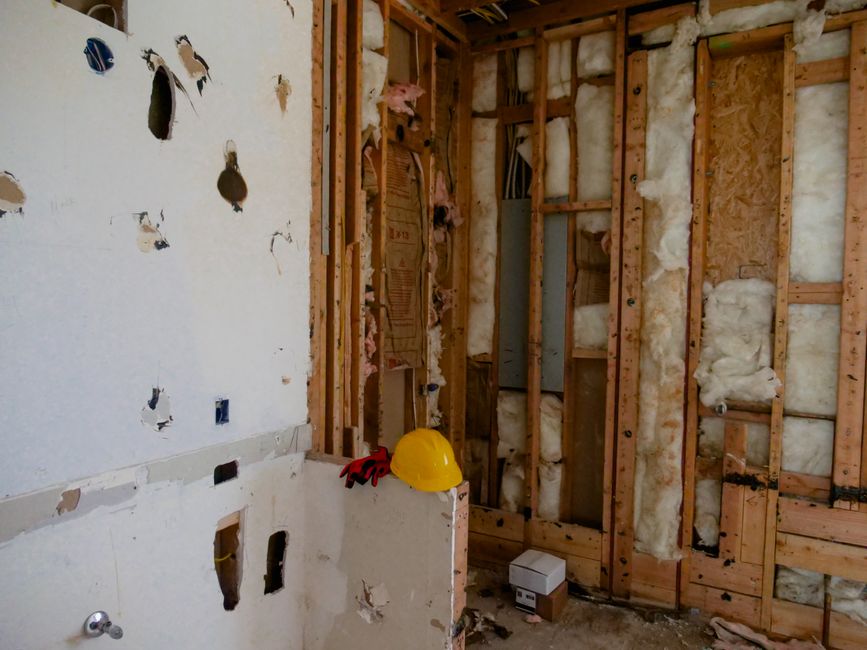
You’re standing in your attic right now, or staring at an open wall cavity. Maybe you got a contractor quote that made you wince. Maybe you’re just tired of high utility bills. Either way, I’m going to give you the version that actually works.
Here’s what gets missed: spray foam and fiberglass aren’t competing for the same job. Once you see what each does well, the choice gets simple.
What You’re Actually Choosing Between
Fiberglass batt insulation (the pink Owens Corning or Johns Manville rolls) is spun glass fibers compressed into pre-cut panels. They fit 16-inch or 24-inch stud bays. It slows heat transfer. That’s the job. It does it reasonably well when installed correctly, and that last part matters more than most people realize.
Spray foam comes in two versions. Open-cell expands dramatically, stays spongy, R-3.7 per inch. Closed-cell is denser, harder, R-6 to R-7 per inch, and acts as a vapor barrier. They’re genuinely different products. Anyone telling you to just “pick spray foam” without specifying which type is guessing.
There’s also spray foam in a can. Great Stuff Pro or Froth-Pak kits are DIY-accessible and useful for air sealing gaps, penetrations, rim joists. This is separate from professional two-part systems that need expensive rented equipment.
The Case for Fiberglass: Where It Actually Wins
R-38 fiberglass batts for a 1,200-square-foot attic floor runs roughly $600 to $900 in materials at Home Depot or Menards. Add a respirator, safety glasses, gloves, and disposable coveralls. That’s another $40. You’re done.
For attic floors, fiberglass is hard to beat on cost. You’re adding thermal resistance. It handles that fine. Same for interior partition walls where moisture isn’t a concern and you want sound control.
The real problem: installation quality kills it. A compressed batt, a torn one, gaps around the edges, loses 30 to 50 percent of its rated R-value. I’ve pulled batts out of walls stuffed in like old newspapers. Correct install means snug but not compressed, no gaps, no voids, vapor retarder facing the warm side. In a cold climate, that’s toward the inside of your house.
Fiberglass doesn’t air seal. It’s porous. Air moves through freely. If your house has leaks (and almost every house built before 2000 does), fiberglass alone won’t fix it. You’ll still feel drafts. Moisture issues will persist. This is the number one complaint from homeowners who did a full insulation job with fiberglass and still freeze in January.
Where Spray Foam Earns Its Premium
Closed-cell spray foam at 2 inches gives R-13 plus an air and vapor barrier. Fiberglass gives R-13 with neither. That’s the comparison that matters for crawl spaces, rim joists, anywhere moisture intrusion is real.
Rim joists are my top call for a small DIY spray foam project. The rim joist is that band of framing on top of your foundation wall supporting the floor. It’s freezing cold, full of gaps and cracks, directly responsible for cold floors in basements and crawl spaces. A Froth-Pak 620 kit (around $350 at building supply stores) covers a typical ranch rim joist. You spray 2 to 3 inches of closed-cell, it cures in minutes, and you’ve built a real air and thermal barrier. One of the highest-impact DIY insulation projects out there.
Cathedral ceilings and unvented roof assemblies are where closed-cell spray foam has no DIY alternative. You need specific R-values in specific ratios (often half the total R-value in foam closest to the roof deck), and it requires professional equipment and training. Don’t try a full roof assembly with DIY kits. Get three contractor quotes. Budget $1.50 to $3.50 per board foot, installed.
Open-cell foam works for interior walls, basement walls in some climates, anywhere you want vapor permeability. But avoid it in humid climates or anywhere with moisture risk. It soaks up water and holds it. I’ve seen mold issues in crawl spaces where someone used open-cell to save money. Closed-cell in those locations. Full stop.
The Real DIY Question
| Project | Material Cost | Equipment/Tools | Total Est. Cost | DIY Feasibility |
|---|---|---|---|---|
| Attic floor (1,200 sq ft) with fiberglass | $600-$900 | Respirator, gloves, coveralls (~$40) | ~$650-$950 | High |
| Rim joist with Froth-Pak 620 | ~$350 | Applicator gun (included) | ~$350 | High |
| Attic air sealing with canned foam | $100-$200 | Caulk gun, safety gear | ~$150-$250 | High |
| Rented spray foam equipment (weekend) | $160-$240 per component | Equipment rental | $1,660-$2,740 | Medium |
| Cathedral ceiling (professional) | - | Professional equipment required | $1.50-$3.50/board foot | Not DIY |
The best ROI projects for DIY: attic air sealing with canned foam around penetrations and light fixtures, fiberglass batts on the attic floor, and rim joist insulation with a Froth-Pak kit. These three cut heating and cooling bills meaningfully, often 15 to 25 percent. You can do all of it for under $1,000 in most cases.
Skip: full wall cavities in finished homes (tear-out costs kill your savings), spray foam on vented roof decks, anything near HVAC ductwork or return air systems without understanding pressure balance.
Rented spray foam equipment from SprayEZ or GrecoSystem handles larger projects if you’re comfortable learning it. Equipment rental runs $1,500 to $2,500 for a weekend. Two-component foam sets cost $80 to $120 each, covering about 200 board feet at 1 inch. Do the math. For mid-size projects, a pro bid is often competitive.
Vapor Barriers and Climate: The Part Nobody Explains Well
This trips people up more than anything. Whether you need a vapor barrier, where it goes, what type, depends almost entirely on your climate zone. Minnesota (Zone 6 or 7) means vapor moves inside to outside in winter, so the retarder goes on the interior (warm side). Florida (Zone 2) works opposite in summer. Some climates are mixed. The answer gets genuinely complicated.
Closed-cell spray foam solves this because it’s its own vapor barrier at 2 inches or more. Fiberglass doesn’t. That’s why kraft-faced batts have paper acting as a class II vapor retarder. That’s why you sometimes need 6-mil poly over unfaced batts.
The IRC (International Residential Code) has specific requirements by climate zone. Look up your zone on the Building America Solution Center website before starting. Ten minutes. Could save you a genuinely expensive mistake.
Pick the project you can actually do well, not the most ambitious one. A properly installed attic with air sealing and fiberglass batts will outperform a sloppy spray foam job every time. Know your limits. Know your climate. Spend the money where it moves the needle.
Photo: Kindel Media via Pexels
Sources
- Kindel Media
- Renogy 200W Solar Starter Kit + 30A Charge Controller
- Renogy 200W Solar Kit + 20A MPPT Controller
Disclosure: As an Amazon Associate, we earn a small commission from qualifying purchases at no extra cost to you. We only recommend products that genuinely support the topics covered in this article.
- Renogy 200W Solar Starter Kit + 30A Charge Controller (~$169), Complete beginner solar kit, 200W monocrystalline panel, charge controller, and mounting hardware included.
- Renogy 200W Solar Kit + 20A MPPT Controller (~$199), 200W panel kit with MPPT charge controller for maximum energy harvest.