 Paul Zhang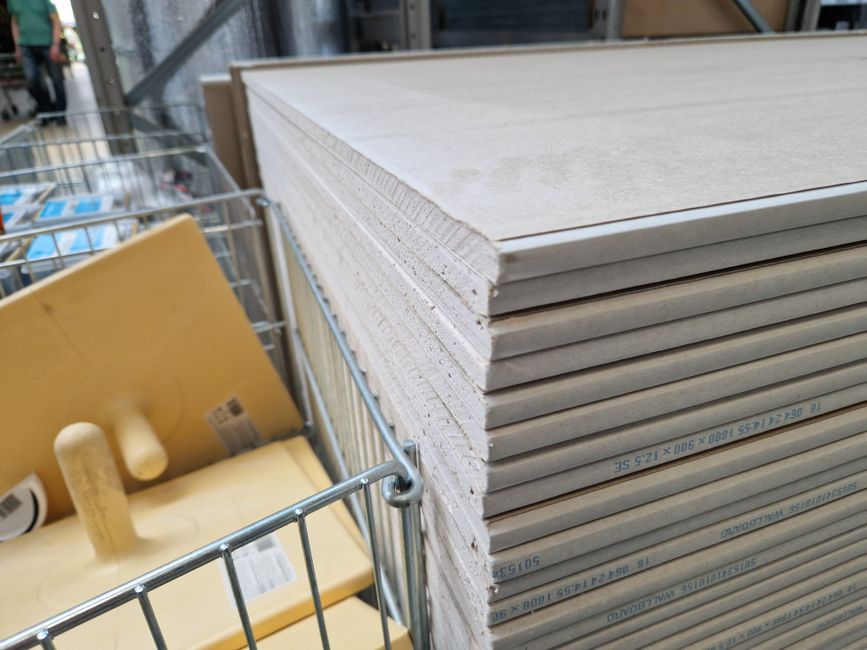
Most homeowners assume drywall water damage is a cosmetic problem. It’s not. The water you can see is usually the least of your worries.
I’ve been in thousands of homes over the last two decades, and I’ll be honest: the jobs that ended up costing the most weren’t the ones with dramatic flooding. They were the slow, quiet leaks. The drip under the bathroom sink that nobody noticed for six months. The ice dam that pushed water through a ceiling seam for two or three winters before the paint started bubbling. By the time the drywall looks bad, there’s almost always something worse hiding behind it.
That said, not every water-stained ceiling is a disaster. Plenty of water damage is genuinely straightforward to fix yourself, and I don’t want you calling a contractor for a $40 repair. So let me walk you through how to actually assess what you’re dealing with, what the repair involves, and where the line is between a DIY job and a “put the phone down and call someone” situation.
First Things First: Stop the Water
This sounds obvious, but you’d be surprised how often I see homeowners patching over damage before they’ve confirmed the source is gone. I made this mistake exactly once, early in my career, on a rental property rehab. We skim-coated a bedroom ceiling, primed it, painted it, moved on. Tenant moved in. Thirty days later, same stain, same spot. The roof flashing was still leaking. We did the job twice.
Before you touch the drywall, you need to confirm the moisture source is fixed and the material is dry. Not “it looks dry.” Actually dry.
A decent pin-type moisture meter costs between $25 and $60 (I use a Calculated Industries model that runs about $45, as of July 2026). Drywall should read below 1% moisture content before you repair. Anything above that and you’re sealing in a problem. Mold grows at sustained moisture levels around 70% relative humidity or higher, and wet drywall can hit that threshold in 24 to 48 hours. The EPA’s own guidance says materials that have been wet for more than 48 to 72 hours should be evaluated for mold before remediation, not just dried out and patched.
Assessing the Damage: What Are You Actually Dealing With?
| Damage Type | Signs | Repair Method | Complexity |
|---|---|---|---|
| Surface staining only | Firm drywall, no soft spots, intact paper face | Clean, prime with shellac-based blocker, paint | DIY-friendly |
| Compromised drywall core | Spongy/crumbly texture, paper delamination, thumb pushes through | Cut out and replace with patch piece | DIY-moderate |
| Mold present | Fuzzy growth, musty smell after drying | Professional assessment recommended for living spaces | Professional-recommended |
Water damage in drywall falls into roughly three categories, and treating them the same is where people go wrong.
Surface staining only. The drywall feels firm, no soft spots, no bubbling, no mold. The paper face is intact. This means the water came through fast and dried before it fully saturated the core. You’ll see this after a one-time event like a burst pipe that got caught quickly, or a small roof leak that dried between rainstorms. This is genuinely paintable. Clean the stain with a diluted bleach solution (one cup bleach per gallon of water), let it dry completely, prime with a shellac-based stain blocker (Zinsser BIN is the one I keep in my truck), and paint. Total materials: under $30. Time: one afternoon.
Compromised drywall core. Press the area with your thumb. If it gives even slightly, if it feels spongy or crumbly, or if you see paper delaminating from the gypsum core, you’re looking at replacement, not repair. Wet gypsum loses structural integrity fast and it doesn’t fully recover when it dries. Skim coating over soft drywall is money wasted. You’ll need to cut it out.
Mold present. Fuzzy growth in any color, or a persistent musty smell even after drying, changes the calculation significantly. Small areas (under 10 square feet) are often owner-DIY-able with proper PPE and an EPA-registered disinfectant, but I’d push back on that guidance for anything in a living space or near HVAC returns. The liability of missing mold behind a wall isn’t worth the repair savings. Get an assessment.
The Actual Repair Process
How to Fix a Drywall Crack in Ceiling or Wall FOR EVER!!! Tutorial · Komar Project on YouTube
Assuming you’ve confirmed the source is fixed, the area is genuinely dry, and the damage doesn’t involve mold, here’s how to do this properly.
Cut back to solid material. Don’t try to save soft drywall by feathering around it. Use a drywall saw or an oscillating multi-tool to cut a clean opening back to the nearest studs or joists on both sides. Studs are typically 16 inches on center in residential construction, so your patch piece can usually span cleanly between two of them.
Check behind the wall. I know it adds time. Do it anyway. Shine a flashlight in there, look for staining on framing, insulation that’s discolored or compressed, or any remaining moisture. If you see black staining on studs, that’s mold on wood. Treat it with a product like Concrobium Mold Control or a 10% bleach solution and let it dry before you close the wall.
Backing for smaller patches. If your patch doesn’t land on studs, you have two options: California patch (also called a hot patch) for holes under about 6 inches, or plywood or 1x3 wood backing screwed to the inside of the existing drywall on either side of the opening. I prefer the backing method for anything bigger than a fist because the California patch relies on the paper face for strength, which gets more fragile as patch size increases.
Match your thickness. Residential walls are almost universally 1/2-inch drywall. Ceilings are often 5/8-inch for fire rating or sag resistance. Measure before you buy your patch piece. Using the wrong thickness creates a step at the seam that no amount of joint compound will hide cleanly.
Tape and mud. Paper tape, not mesh, for flat seams. I know mesh tape is easier. It’s also more crack-prone over time because it doesn’t bond to the compound as well as paper does. Use a setting-type compound (the kind you mix from powder, like Durabond 45 or 90) for your first coat if the patch is larger than about 12 inches, because it shrinks less than premixed compound. Finish with two to three coats of lightweight premixed compound, feathering each coat wider than the last. Let each coat dry completely before the next.
A rough timeline: for a 12 by 24 inch patch on a wall, from cutting out to final paint-ready surface, I budget about two full days with drying time factored in.
Prime before you paint. This is the step people skip and regret. Unprimed joint compound is porous and absorbs paint unevenly, creating a phenomenon called “flashing” where your patch is visible even through two coats of paint. Shellac-based primer on the stain, followed by PVA drywall primer on the new compound. Then paint.
Worked example: A reader named Greg, from suburban Columbus, had an upstairs bathroom toilet supply line sweat and drip into his first-floor living room ceiling over about eight months. He discovered it when the ceiling started sagging. By the time I looked at it, he had a 3-foot by 2-foot section of ceiling that was completely shot, plus two joists with surface mold. He treated the joists himself with Concrobium, we confirmed drywall moisture under 1%, cut to clean edges, installed blocking, patched with 5/8-inch drywall, and painted. Total materials cost: roughly $85. Labor time for one person: about 6 hours spread over two days. The patch is invisible today.
What Things Actually Cost
Straight talk on pricing, current as of July 2026:
Materials for a straightforward DIY ceiling or wall patch (up to 2 square feet): $30 to $60, including drywall panel (sold in full 4x8 sheets for $15 to $20 each, or as smaller scrap pieces at some lumber yards), joint compound, tape, primer, and paint.
Professional drywall repair for a small to medium patch (say, 1 to 4 square feet): $150 to $350 depending on your market and ceiling vs. wall location. Ceilings cost more because they’re harder.
If mold remediation is involved, that’s a separate line item. Expect $500 to $1,500 for contained small-area remediation by a certified professional. Full room remediation climbs fast from there.
What surprised me, looking at this market over the past year, is how much the labor rate on small drywall repairs has jumped. When I started out, a handyman would patch a ceiling for $75 to $100. Today, that same patch in most metro areas runs $200 minimum, and in high cost-of-living cities like Denver or Boston it’s closer to $300 to $400. The materials haven’t changed that much. The skilled labor shortage in trades has.
Worked example: A homeowner in Portland tried to save money by skipping professional mold testing after a washing machine supply line leak soaked a laundry room wall. She patched and painted. Four months later: visible mold bloom at the seam and a professional assessment that found mold behind the adjacent wall cavity. Remediation cost: $2,200. Original remediation quote, which she declined: $650. That’s a painful lesson in false economy.
When to Call a Pro
Call a professional if: the affected area is larger than 10 square feet, if you find any mold (especially if you have respiratory sensitivities in the household), if the damage is in a ceiling and you can’t confirm the source from above, if the framing members feel soft or spongy, or if you see any signs of structural compromise.
I’d also strongly recommend a pro for anything touching an exterior wall cavity in a climate with significant humidity swings, because improper moisture management in those assemblies can cause far worse problems than the original damage.
The DIY line is genuinely clear: small patch, confirmed dry, no mold, visible source that’s been fixed. Outside those conditions, the risk-reward math tips toward professional help pretty quickly.
Sources
- EPA Mold Remediation in Schools and Commercial Buildings Guide: Official EPA guidance on mold assessment, remediation thresholds, and when professional involvement is warranted.
- Gypsum Association GA-216 Application and Finishing of Gypsum Panel Products: Industry standard reference for proper drywall installation, repair, and finishing techniques.
- IRC (International Residential Code) Chapter 7, Wall Covering: Building code provisions governing moisture barriers, thickness requirements, and acceptable repair methods.
- Zinsser BIN Shellac-Based Primer technical data sheet: Manufacturer specs confirming stain-blocking performance on water and smoke stains prior to topcoat application.
Photo: Pablo Fernandez via Pexels





