 Maria Gonzalez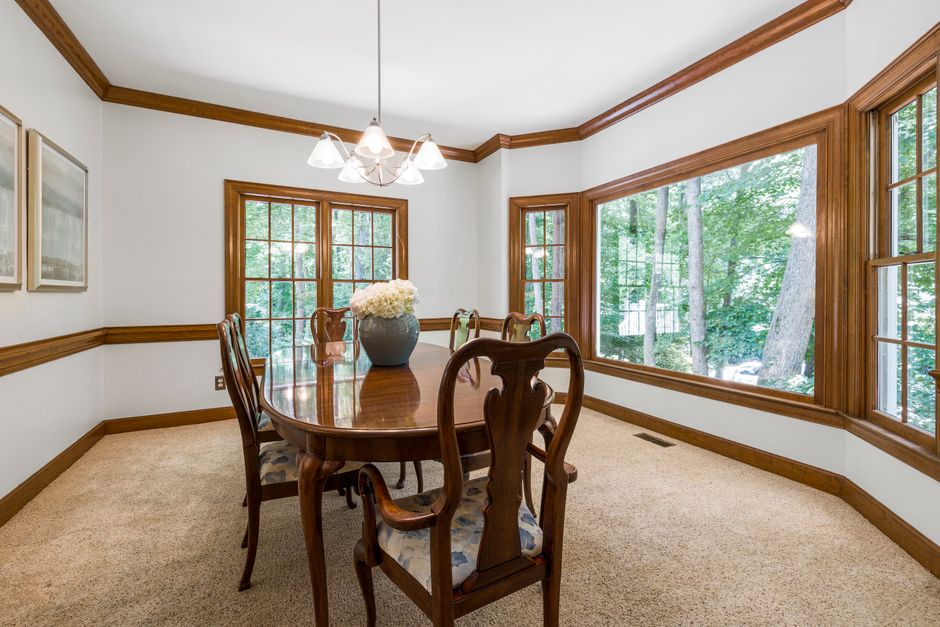
Your windows look drafty, unfinished, or just plain bare. Something’s missing. Learning how to install window trim is one of the most rewarding home improvement projects you can tackle because the results show up immediately and look professional. Whether you’re updating an older home or finishing a new window installation, adding trim transforms a plain opening into something polished and intentional.
The best part? You don’t need carpentry experience. With the right tools, a little patience, and this step-by-step guide, you’ll be surprised what you can pull off.
What Is Window Trim and Why Does It Matter?
Window trim (also called window casing) is the decorative molding that frames the inside or outside of a window. It covers the gap between the window frame and the wall, making everything look finished and intentional.
Beyond looks, trim actually works. It seals out drafts, keeps moisture from sneaking into wall cavities, and adds a layer of insulation around the window edges.
- Interior trim makes any room look better
- Exterior trim protects your home from weather and moisture
- Trim adds value and curb appeal
- It covers rough edges left after window installation
Tools and Materials You Will Need
Gather everything before you start so you’re not running back and forth to the hardware store halfway through. Having your supplies organized makes the job smoother, especially when working on a ladder or in awkward positions.
Here’s what you need:
- Measuring tape, for accurate measurements
- Miter saw or miter box with hand saw, for angled cuts
- Nail gun or hammer and finish nails, 2-inch finish nails work well
- Pry bar, to remove old trim if needed
- Wood putty or spackling compound, to fill nail holes
- Sandpaper (fine grit), to smooth filled areas
- Caulk and caulk gun, to seal gaps
- Pencil, for marking cut lines
- Level, to keep trim straight
- Paint or primer, to finish the trim
- Window trim molding, measure your windows before buying
- Safety glasses and work gloves
Most of these are available at any hardware store. Buy 10 to 15 percent more trim material than you think you need. Mistakes happen, and extra is always better than running short halfway through.
Pro Tip: Bring a photo of your room’s existing woodwork to the hardware store. Matching the profile of your door casings and baseboards creates a cohesive look throughout your home without any extra effort.
Step 1: Remove Old Trim and Prepare the Surface
If you’re replacing existing trim, start by carefully removing the old pieces. Use a pry bar and work slowly to avoid damaging the drywall behind it.
Slide the pry bar gently between the trim and wall, applying light pressure. Move along the length of the piece rather than prying from one spot, which can crack drywall.
- Score along the edge of old trim with a utility knife first to release any caulk or paint seal
- Remove any leftover nails using needle-nose pliers
- Fill holes or gouges in the drywall with spackling and let it dry completely
- Sand the surface smooth before installing new trim
For a brand-new window, just clean the area around the frame and make sure it’s dry and dust-free.
Step 2: Measure and Mark Your Reveal
The “reveal” is the small, uniform gap you leave between the edge of the window frame and the inside edge of your trim. Standard reveal is about 3/16 of an inch, and it gives the installation a clean, intentional look.
Use a pencil and combination square to lightly mark this reveal line all the way around the window frame. This becomes your guide for positioning each piece of trim.
- Mark the reveal on all four sides of the window
- Use a consistent measurement to keep all sides even
- Double-check your marks with a level before cutting anything
Spending a few extra minutes here makes the rest of the installation go much smoother. Rushing this step is the most common reason trim ends up looking uneven.
Step 3: Cut and Install the Side Pieces First
Start with the two vertical side pieces, often called the “leg” pieces. Hold a piece of trim up to one side and mark the top and bottom cut points based on your reveal lines.
For a simple butt joint style, both ends are cut straight at 90 degrees. For a more decorative mitered style, you’ll cut 45-degree angles where the trim pieces meet.
- Cut the bottom of each side piece straight (90 degrees) so it sits flush on the windowsill or floor
- Cut the top at 45 degrees if you’re using mitered corners
- Hold the piece in place and check the fit before nailing
- Nail through the trim into the window frame and into the wall stud if possible
- Space nails about 12 to 16 inches apart
⚠️ Safety: Always wear safety glasses when using a miter saw or nail gun. Keep fingers clear of the blade and never reach under the saw while it’s running. If you’re not comfortable with power tools, a manual miter box and hand saw are excellent alternatives that are very safe and easy to use.
Step 4: Measure, Cut, and Install the Top Piece
Once both side pieces are nailed in place, measure the distance between them along your reveal line at the top of the window. This measurement tells you the length of your top header piece.
If you’re using mitered corners, both ends of the top piece will be cut at 45-degree angles that mirror the angles on top of your side pieces. Test the fit before nailing to make sure the corners come together snugly.
- Measure twice and cut once, this really matters
- Use a scrap piece of trim to test your miter angles before cutting your good piece
- Apply a small amount of wood glue to the mitered joints before nailing for extra strength
- Nail the top piece into the window frame and wall
Once all three main pieces are in place, step back and check that the corners line up well and the reveal looks even all around. Minor adjustments can still be made at this stage.
Step 5: Fill, Caulk, Sand, and Paint
With all the trim nailed in place, it’s time for the finishing touches that separate a great result from a mediocre one. This stage takes patience, but it’s where the magic happens.
Start by filling all nail holes with wood putty. Let it dry, then sand smooth with fine-grit sandpaper.
- Apply a thin bead of paintable caulk along the seam where the trim meets the wall
- Smooth the caulk with a damp finger or caulk tool
- Also caulk along the inside edge where the trim meets the window frame
- Allow everything to dry completely, usually 24 hours
- Apply a coat of primer followed by two coats of paint in your chosen color
- Use a small angled brush for clean, neat paint lines
Most people choose white or off-white trim paint to create a bright, classic contrast against colored walls. But trim painted to match your wall color creates a more modern look that feels intentional rather than traditional.
You Can Do This!
Installing window trim delivers an impressive payoff for a modest investment of time and money. Once you finish your first window, you’ll probably want to update every window in your home.
Take your time with each step, don’t rush the finishing work, and be proud of every nail you drive. Skills like this keep you independent, save you money, and give you real satisfaction every time you walk past a window you trimmed yourself.
One measurement, one cut, one beautiful window at a time.





