 Steve Adams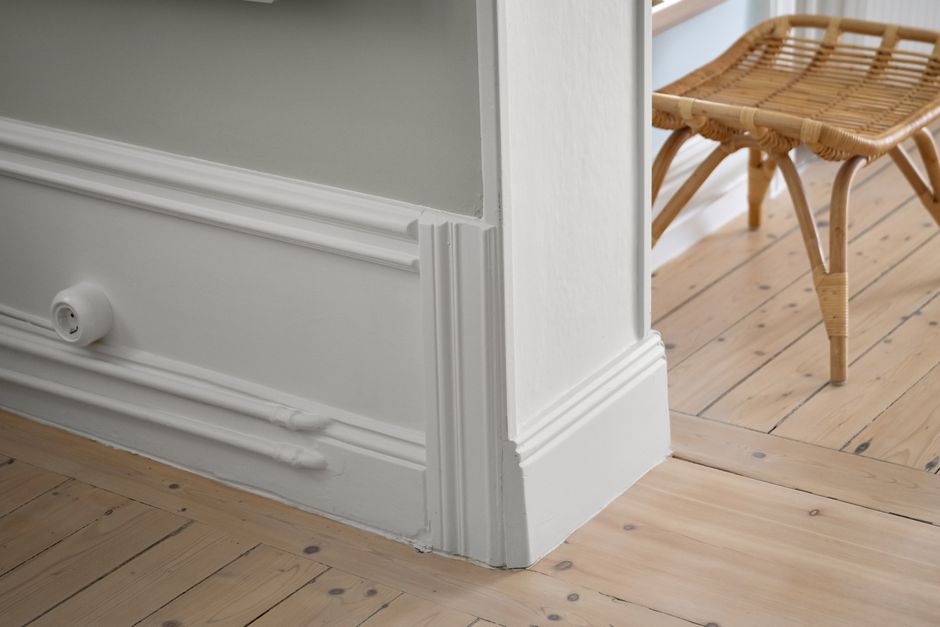
Most people assume baseboard installation is a finish carpentry skill that takes years to develop. I thought the same thing, until I tracked down what contractors actually charge for it.
The number that stopped me cold: according to HomeAdvisor’s 2025 cost data, professional baseboard installation runs between $4.50 and $7.00 per linear foot installed, labor only. On a modest 1,400-square-foot house with roughly 350 linear feet of baseboard, that’s $1,575 to $2,450 just for someone to nail trim to your walls. The material itself, decent 3.5-inch colonial-profile MDF from Home Depot, runs about $0.85 to $1.40 per linear foot. The math makes a compelling case for learning this skill yourself.
I’ll be honest: my first baseboard job looked like something installed during an earthquake. Gaps at the corners. Pieces that didn’t quite reach the floor. One section where I had genuinely no idea what went wrong and just caulked it aggressively and hoped nobody looked too close. But I’ve now done it on dozens of projects, and what surprised me was how predictable the mistakes are. Almost every beginner blows it on the same three things. This article is about those things, and how to avoid them.
The Tools That Actually Matter
Skip the advice that says you need a miter saw to do this. You don’t, technically. What you need is accurate cuts, and a quality miter saw makes accurate cuts easier. A 10-inch compound miter saw (the Ryobi TSSC10J1 runs about $249 at Home Depot as of July 2026) will handle every cut in baseboard installation. A sliding compound miter saw gives you a wider crosscut capacity but isn’t necessary for baseboard narrower than 6 inches.
What beginners consistently skip, and regret, is a decent stud finder. The Zircon MetalliScanner i520 ($35) has saved me more times than I can count. You’re nailing into studs and the bottom wall plate, and guessing wrong means a nail that hits nothing and a hole you have to patch. Speaking from experience: drywall anchors are not an acceptable substitute for hitting a stud with finish trim.
The other thing worth mentioning: buy a 15-gauge or 16-gauge finish nailer if you’re doing more than one room. A brad nailer (18-gauge) technically works but leaves small-diameter nails that don’t hold well in MDF, which is what most modern baseboard is made of. Hand-nailing with a hammer is absolutely possible, but you’ll need a nail set, patience, and a willingness to occasionally put a dent in the wood when you miss.
Understanding Your Material Options Before You Buy Anything
Here’s where a lot of beginners overspend or under-buy without knowing it. The choice of material affects how you cut, how you nail, and how forgiving the finished product looks.
| Material | Cost Per Linear Foot | Paintability | Moisture Resistance | Best For |
|---|---|---|---|---|
| Solid wood (pine) | $1.80 - $3.20 | Excellent with primer | Low | Staining, premium painted look |
| MDF (medium density fiberboard) | $0.85 - $1.40 | Excellent | Very low | Painted interiors, budget installs |
| Finger-jointed pine | $1.10 - $1.70 | Good with primer | Low | Painted only, cost savings |
| PVC/cellular PVC | $2.40 - $4.50 | Moderate | Excellent | Bathrooms, laundry rooms |
| Composite/poly | $2.20 - $3.80 | Good | High | High-humidity areas |
MDF is the contractor default for most painted baseboard installs today, and honestly it’s the right call for beginners: it’s dimensionally stable, takes paint beautifully, and cuts cleanly without the grain tearout you sometimes get with solid pine. The weakness is moisture. In a bathroom or laundry room, the bottom edge of MDF will wick water and swell, so use PVC or composite there.
What surprised me when I dug into this: the NAHB (National Association of Home Builders) estimated in their 2023 cost survey that trim materials represent only about 15 to 20 percent of the total installed cost. The labor eats the rest. Which reinforces why doing this yourself, even slowly, makes financial sense.
Measuring, Planning, and the Mistake That Costs You Money
Measure every wall length at floor level. Not at 48 inches, not at shoulder height, at the floor. Walls bow. Floors are uneven. A measurement taken 3 feet up can be off by a quarter inch at the floor, and a quarter inch matters in miter joints.
Plan your pieces so the longest walls get unbroken runs where possible. Splicing two pieces on a long wall with a scarf joint is fine, but it’s a weak point visually. When you do need to splice, cut both pieces at 22.5 degrees, not 45, so the joint overlaps and the seam is less visible from the front. Nail both pieces and sand the joint flat after.
For a room with four standard square corners, you’ll have:
- Four inside corners (where two walls meet inward)
- Zero or more outside corners (where trim wraps a protruding wall or column)
Inside corners: I coped mine for years before I understood why. The reason is that your walls are almost certainly not 90 degrees. Most interior corners measure between 88 and 92 degrees, and a 45/45 miter at a non-90 corner leaves a gap. Coping, where you cut the profile of the first piece into the end of the second piece with a coping saw, leaves a tight joint regardless of the actual corner angle. For beginners who don’t want to cope: butt the first piece into the corner flat, then cut the second piece at the actual corner angle (measure it with a digital angle finder, the Empire Level model 36 runs about $22) and test-fit before nailing. It won’t be perfect but it’ll be close.
Outside corners are mitered. Measure the actual angle, divide by two, set your saw to that. In my experience, almost no outside corner in a residential house is actually 45 degrees.
A worked example that illustrates the stakes: a reader from Portland named Garrett emailed me after installing baseboard in a 1960s ranch house. He’d measured at 90 degrees everywhere, cut all his miters at 45/45, and ended up with visible gaps at every single inside corner. He went back, measured the actual angles (the worst was 87.3 degrees), recut the pieces, and the joints closed up. Total extra material cost: about $23 in replacement trim. Time lost: half a Saturday.
The Installation Sequence, Step by Step
Start with the longest, straightest wall in the room. This is your control piece and it’s the one where a mistake costs you the most material if you cut it wrong, so don’t start with the longest piece at all. Start with a short piece on a secondary wall to calibrate your process.
Step 1: Mark your studs. Run the stud finder across the bottom of the wall at about 4 inches off the floor, mark with a pencil. Also find the bottom wall plate, which runs horizontally along the base of the wall and is solid backing every inch of the way. You can always nail into the plate.
Step 2: Cut your first piece slightly long. I mean by about 1/16 inch. You can trim it down; you can’t add material back. Test fit before nailing.
Step 3: Nail the piece to the studs first, then the plate. Set your nailer at an angle, driving nails toward the stud at about 30 to 40 degrees. For MDF, use 15-gauge 2-inch nails into studs and 1.5-inch nails into the plate. MDF will split if your nails are too close to the end, so stay at least 2 inches from end cuts.
Step 4: Fill nail holes, then caulk the top edge. Not the other way around. Fill holes with lightweight spackle, let it dry, sand lightly. Then run painter’s caulk along the top where the baseboard meets the wall. This is the single step beginners skip most often, and it’s what separates a professional-looking job from an amateur one. A thin, consistent bead smoothed with a damp finger closes the gap between the trim and the wall surface, which is almost never perfectly flat.
Step 5: Prime and paint. If you painted the walls first (and you probably should have), tape the floor and shoot two coats of a high-quality trim paint. I’ve used Benjamin Moore Advance for years: it levels beautifully and dries hard. A quart runs about $38 and covers roughly 400 square feet of trim surface.
A second worked example: a first-time DIYer named Keisha installed 280 linear feet of 3.5-inch MDF colonial baseboard in a two-bedroom condo. Total material cost: $312 (trim plus nails plus caulk plus paint). Rental of a finish nailer from Home Depot for a weekend: $47. She photographed her results and the joints were tight. Professional quotes she’d received ranged from $1,260 to $1,680. Net savings: roughly $900, in a single weekend.
What This Actually Costs, Start to Finish
These numbers reflect a 350-linear-foot house, which is typical for a 3-bedroom home. The DIY material figure assumes MDF baseboard at around $1.20 per linear foot average, plus nails, caulk, sandpaper, and two quarts of trim paint. If you already own a finish nailer, your out-of-pocket drops further.
One honest caveat on the pro-cost figures: in high cost-of-living metros (Seattle, Boston, the Bay Area), professional trim carpenter rates run higher than the national average HomeAdvisor tracks. I don’t have current 2026 localized data for every market, so check multiple local quotes if you’re trying to benchmark your own area.
When to Call a Pro Anyway
There are situations where I’d tell you not to bother doing it yourself. Crown molding combined with baseboard in rooms with cathedral ceilings or highly irregular walls: the compound angle cuts require either very precise math or a lot of experience, and a botched inside corner on 12-foot cathedral walls is a painful mistake. If your floors have significant slope or your walls have substantial waves or bows, a finish carpenter with coping saws and 20 years of experience will get a result you can’t match as a beginner.
Also: if the room involves door and window casings that need to integrate with the baseboard (which means cutting return pieces, dealing with different trim depths, and sometimes scribing), that’s a more complex project than “just baseboard” and it’s worth at least getting a pro quote before assuming you can do it all.
Sources
- HomeAdvisor (2025): National cost data for baseboard installation, labor and material ranges by project size
- National Association of Home Builders, NAHB Cost of Construction Survey (2023): Breakdown of trim material vs. labor cost proportions in residential construction
- Empire Level product specifications: Digital angle finder accuracy ratings for interior angle measurement
- Benjamin Moore product documentation (current as of July 2026): Advance interior trim paint coverage and application specs
- Fine Homebuilding Magazine, “Coping vs. Mitering Interior Trim” (2022): Technical comparison of joint methods for non-square interior corners
Photo: Lisa Anna via Pexels





