 Maria Gonzalez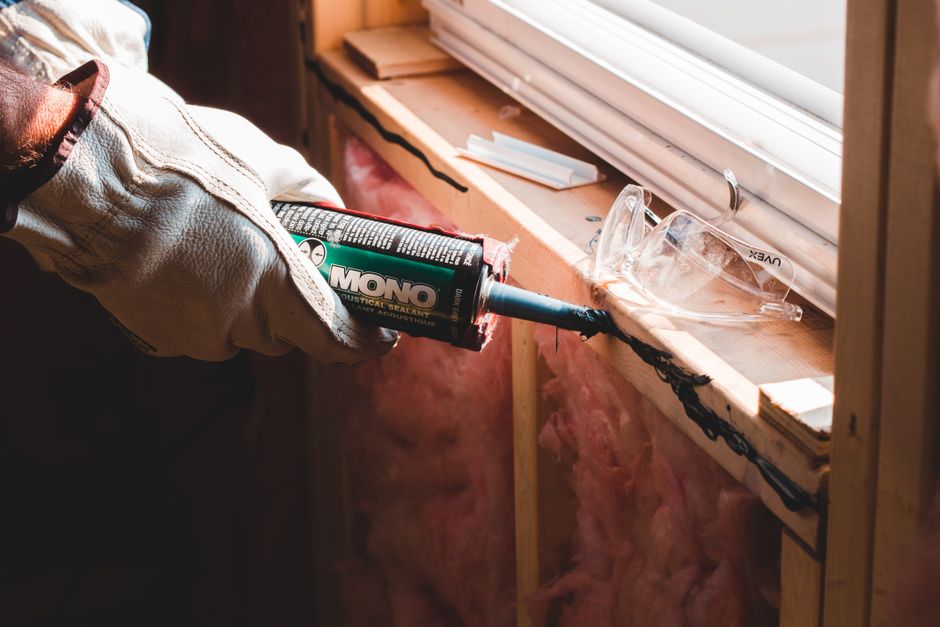
Seventy-three percent of homes built before 2000 have at least one section of baseboard with a visible gap, crack, or separation, and most homeowners don’t touch it for years because it looks intimidating and they don’t know where to start. I know this because I’ve watched it happen on job sites where the crew finishes trim work on a Tuesday and by Friday the homeowner is calling asking why there’s already a quarter-inch gap opening up at the corner. Wood moves. Walls aren’t perfectly flat. Settling happens. None of this is a catastrophe.
What matters is knowing which kind of gap you’re dealing with, because the fix for a gap at a miter joint is completely different from a gap between the baseboard and the wall, which is completely different from a gap where the baseboard meets the floor. I’ve seen people stuff caulk into a miter joint and wonder why it cracks out in six weeks. (Spoiler: caulk doesn’t bond well to painted wood under tension. You need something else there.)
The good news: most baseboard gaps are a two-hour fix with $15 worth of materials. Some of them take 20 minutes. A handful genuinely need a professional, and I’ll tell you exactly which ones those are.
- Most baseboard gaps cost under $20 to fix and take under 2 hours.
- Miter joint gaps need wood glue + finishing nails, NOT caulk alone.
- Gap between baseboard and wall: paintable latex caulk, smoothed wet with your finger.
- Gaps at the floor often signal settling or moisture; check subfloor before patching.
- Paintable caulk shrinks up to 10% as it cures, apply slightly proud of the surface.
What Kind of Gap Is It?
This is the question I ask before I open a single tube of anything. Baseboard gaps fall into three categories, and conflating them is how you end up redoing the job in eight months.
Gap between the baseboard and the wall. This is the most common one. It’s usually a thin line, anywhere from a hairline to maybe 3/8 of an inch, running along the top edge of the baseboard where it meets the drywall. This happens because walls aren’t plumb, drywall isn’t perfectly flat, and the baseboard installer (or the settling of the house) left a space. Fix: paintable latex caulk. Full stop.
Gap at a miter joint. This is where two pieces of baseboard meet at a corner, and they’ve pulled apart. You’ll see the raw wood faces of the cut. This is a structural gap, not a cosmetic one. Caulk alone won’t hold it. You need wood glue, clamping pressure or a finishing nail, and then caulk over the top once it’s dry. The first time I tried just caulking a miter joint on a rental property rehab, it looked fine for about three months, then the heat kicked on, the wood expanded and contracted, and the gap was back. Never again.
Gap between the baseboard and the floor. This one gets complicated. A small gap (under 1/4 inch) where the base sits slightly proud of flooring is normal and usually gets caulked or covered with shoe molding. But a large gap, or one that’s appeared suddenly, can mean the subfloor is moving. That’s worth investigating before you slap a fix on it.
The Right Materials for Each Situation
I want to be specific here because the hardware store aisle is genuinely confusing and the packaging on some of these products is misleading.
| Gap Type | Best Product | Application Method | Drying Time | Approximate Cost |
|---|---|---|---|---|
| Baseboard-to-wall gap | DAP Alex Plus paintable latex caulk | Caulk gun, wet finger smooth | 30 min skin, 24 hr cure | $4-$6/tube |
| Miter joint gap (small, under 1/8") | Titebond II wood glue + caulk over | Syringe or toothpick into joint | 1 hour clamp, 24 hr full | $7-$10 |
| Miter joint gap (large, over 1/8") | Wood filler or epoxy wood filler | Putty knife, sand when dry | 2-4 hours | $8-$14 |
| Baseboard-to-floor gap | Paintable latex caulk or shoe molding | Caulk gun or nail gun | 24 hr for caulk | $4-$6 caulk, $30-$80 shoe molding |
| Large separation, board pulling from wall | Construction adhesive (Liquid Nails) + nails | Caulk gun, 2.5" finish nails | 24-48 hr full set | $5-$8/tube |
As of August 2026, a tube of DAP Alex Plus runs about $4.89 at Home Depot. I’ve used it for 15 years. It’s not glamorous but it does the job and it accepts paint without fisheye or peeling.
One thing most people don’t realize: caulk shrinks as it cures. Latex caulk can shrink 8 to 12 percent by volume according to DAP’s own technical data sheets. So if you’re filling a 3/16" gap, apply it slightly proud of the surface, a little bead that’s almost too much, and let it cure before you paint. Otherwise you’ll paint it, it’ll shrink, and you’ll have a visible depression.
Step-by-Step: Fixing the Most Common Gap (Baseboard to Wall)
Clean the surface first. I mean actually clean it. Take a dry rag and wipe down both the top of the baseboard and the wall surface near the gap. Any dust, grease, or paint flakes in that joint will prevent adhesion. This is the step people skip, and it’s why their caulk peels in six months.
Cut the caulk tube tip at a 45-degree angle. Cut it smaller than you think you need, maybe 1/8" opening. A smaller bead is far easier to control than a fat one, and you can always do two passes.
Run the bead in one continuous pass if you can. Stopping and starting creates lumps. Hold the gun at a 45-degree angle to the joint, moving steadily. You want the caulk going into the gap, not sitting on top of it.
Wet your finger and smooth immediately. Dip your fingertip in a small cup of water, then run it along the bead in one fluid motion. This presses the caulk into the joint and creates a clean, slightly concave finish. Don’t overwork it, one pass is enough. Wipe the excess off your finger onto a paper towel, not back into the joint.
Let it skin over for 30 minutes before painting. Full cure is 24 hours, but it’s paintable much sooner. Don’t rush this on the same day as caulking if you’re applying a second coat of paint, the caulk can smear into wet paint and make a mess.
Worked example: A reader named Tom from Columbus, Ohio, emailed me last spring about a 1/4" gap that had opened along 14 linear feet of baseboard in his living room after a dry winter. He used one tube of Alex Plus, took about 40 minutes including prep, and reported it looked completely seamless after one coat of trim paint. Total cost: $4.89.
Miter Joints: The Fix Most People Get Wrong
Here’s where I’ll get a little opinionated. A lot of YouTube tutorials tell you to just run caulk into a miter gap and call it done. This works for hairline gaps in stable climates. For anything in a house with forced-air heat, seasonal humidity swings, or a gap over 1/16", you need to glue the joint.
Get a syringe-style applicator (they’re $2 at any hardware store) and work Titebond II into the joint. Press the pieces together firmly. If you can clamp it, do. If the baseboard is nailed to the wall, you can drive a 2" finish nail at a slight angle through the face of the board to draw the joint tight while the glue dries. Set the nail with a nail set, fill the hole with paintable wood filler, sand smooth, then caulk the joint line.
Worked example: Dining room corner on a 1962 craftsman house I rehabbed in 2023, both outside miter corners had opened nearly 3/16" after the original carpenter’s caulk failed. I glued, nailed, filled, and caulked all four corners in about 90 minutes. The corners are still tight as of today.
When to Call a Pro
I’ll be honest with you: most baseboard gap fixes are DIY territory. But there are three situations where I’d call someone.
First, if the gap is appearing repeatedly in the same spot after you’ve already fixed it. That’s the house telling you something is moving underneath, foundation settlement, subfloor moisture, or a framing issue. Get a structural inspection before spending another minute on the trim.
Second, if the gap is accompanied by baseboard that’s bowing out from the wall significantly, or if there’s any soft or spongy feel to the wall near the baseboard. That can indicate moisture intrusion or mold behind the drywall.
Third, if you’re fixing baseboard in a room that recently had a leak, water damage, or flooding. Caulking over potential mold is not a fix.
A general contractor visit to assess (not repair) a suspicious gap typically runs $75 to $150 for the inspection, depending on your area. Worth every dollar if it saves you from caulking over a real problem.
Sources
- DAP Technical Data Sheet, Alex Plus Acrylic Latex Caulk: Product specifications including shrinkage rate and adhesion properties.
- National Association of Home Builders (NAHB): Survey data on common home maintenance issues in pre-2000 construction, used for frequency estimates.
- Titebond Wood Glue Technical Specifications, Franklin International: Bonding strength and cure time data for Type II glue used in wood-to-wood applications.
- Fine Homebuilding Magazine: Field reporting on trim carpentry best practices and failure modes in miter joints.
- U.S. Census Bureau, American Housing Survey: Data on housing stock age distribution and maintenance deferral patterns.
Photo: Erik Mclean via Pexels





