 Dana Morrison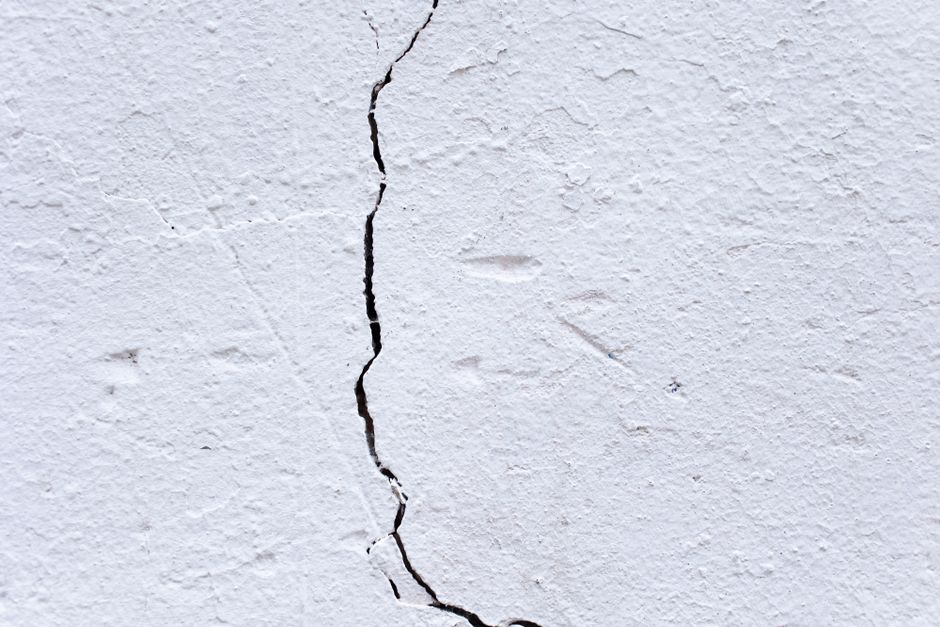
Hairline cracks are lying to you.
Most homeowners look at a thin crack in their plaster wall and think: a little spackling, some paint, done in 20 minutes. I thought the same thing the first time I dealt with old plaster in a 1940s colonial I was renovating outside of Hartford. Two coats of paint later, the crack was back, darker than before, laughing at me through the finish. That’s when I actually learned how plaster cracks work, and why the quick fix almost always fails.
Here’s what’s actually happening in most plaster walls: there’s movement. Thermal expansion, house settling, humidity changes, the occasional door slam. Plaster is rigid. It doesn’t want to move, and when it’s forced to, it cracks. If you don’t address the cause of the movement, or at minimum give the repair some flexibility, paint alone will re-crack within months. Sometimes weeks.
Let me walk you through how to do this correctly, the first time.
First: Figure Out What Kind of Crack You’re Actually Dealing With
Not all cracks are equal, and treating them the same is mistake number one.
Hairline cracks (under 1/16 inch wide) are usually cosmetic. They form when the finish coat of plaster shrinks slightly, or when paint builds up over decades and loses adhesion. These are the easiest to fix, but they still require more than a swipe of spackle if you want a durable result.
Medium cracks (1/16 to 1/4 inch wide) often signal that the bond between plaster coats is weakening, or that there’s real structural movement behind the wall. Before you fill these, press gently around the edges. If the plaster flexes or feels soft, you’ve got bigger problems.
Wide cracks or step cracks (anything wider than 1/4 inch, especially diagonal cracks running through plaster near corners or windows) can indicate foundation settlement or framing movement. I’ll be honest: if you’re seeing multiple diagonal cracks appearing together in different rooms, that’s a conversation for a structural engineer before you pick up a putty knife.
A reader named Carla from Pittsburgh emailed me last fall with photos of a “cosmetic crack” in her dining room. The crack was 3/8 inch wide, running at a 45-degree angle from a window corner, and she’d already filled it twice in two years. That’s a red flag pattern. Before repainting, she had a structural engineer look at it. Turned out there was minor (non-urgent) foundation movement on one corner of her house that explained it. She knew what she was dealing with and patched it accordingly, with a flexible repair that she could monitor.
The other thing to check: is the surrounding plaster still bonded to the lath? Tap along the wall with your knuckles. A hollow sound means the plaster has separated from the wood or metal lath behind it. That section needs to come down and be replastered, not patched from the surface. Patching over hollow plaster is throwing money at a wall that’s going to fail anyway.
The Right Materials (and Why Most People Grab the Wrong Thing)
| Material | Best Use | Shrinkage | Working Time | Approx. Cost |
|---|---|---|---|---|
| Standard vinyl spackling | Hairline cracks only | High | N/A | $3-5 |
| Setting-type joint compound (Durabond 45) | Medium to wide cracks | None | ~45 minutes | $12-15 |
| Setting-type joint compound (Durabond 90) | Medium to wide cracks | None | ~90 minutes | $12-15 |
| Lightweight all-purpose compound | Feathering & final coats | High | N/A | $14-18 |
| Plaster of Paris | Textured surfaces & deep voids | Minimal | Fast | $4-7 |
| Fiberglass mesh tape (2-inch) | Reinforcement for recurring cracks | N/A | N/A | $5-8 |
Walk into any hardware store and you’ll see about a dozen products that claim to fix cracks. Most of them are fine for drywall. Plaster is a different animal.
What surprised me, after years of using standard vinyl spackling on old plaster repairs, is how much better the results are with the right material. Here’s the breakdown:
Standard vinyl spackling (like DAP Spackling or Red Devil One Time) works fine for tiny hairline cracks, but it shrinks as it dries. On anything wider than 1/16 inch, you’ll get a slight depression that shows through paint.
Setting-type joint compound (the powder you mix with water, like DAP Durabond 45 or Durabond 90) is what I reach for on medium to wide cracks. It doesn’t shrink, it’s hard as a rock when it cures, and it bonds well to old plaster. The number refers to working time in minutes, so Durabond 45 gives you about 45 minutes before it starts to harden. For repair work, I usually use the 90 for more control.
Lightweight all-purpose joint compound (pre-mixed, in the bucket) is great for feathering and final coats. Do not use it as your base fill, though. It shrinks too much.
Plaster of Paris is fast and hard, but it’s brittle and has almost no forgiveness for movement. I use it occasionally when I need to match a textured plaster surface or fill a deep void before finishing, but it’s not my first choice for crack repair.
For cracks that keep coming back, the product that genuinely changed my approach is fiberglass mesh tape combined with setting compound. Mesh tape bridges the crack and gives the repair material something to key into, which dramatically reduces re-cracking. I’ll show you how to use it below.
Current material costs (June 2026): a 4.5-lb box of Durabond 45 runs about $12-15 at Home Depot or Lowe’s. A roll of 2-inch fiberglass mesh tape is around $5-8. Pre-mixed all-purpose compound in a one-gallon bucket is about $14-18. You don’t need much for most crack repairs.
The Actual Repair Process, Step by Step
How to Fix a Drywall Crack in Ceiling or Wall FOR EVER!!! Tutorial · Komar Project on YouTube
I’m going to walk through a medium-width crack repair (1/8 inch or so), because that’s the most common real-world situation and it covers the technique used for smaller and larger repairs too.
Step 1: Open the crack. This sounds counterintuitive, but it works. Use a utility knife or a can opener to widen the crack into a “V” shape, about 1/8 inch wide at the surface and a little deeper than the crack itself. You’re creating a mechanical pocket for the filler to grip. Brush out the dust with a dry brush.
Step 2: Dampen the area. Old plaster is thirsty. If you apply compound to dry plaster, it’ll suck the moisture out of your filler too fast and you’ll get a weak bond. Mist the crack and the surrounding 6 inches with water from a spray bottle. Not soaking wet, just damp.
Step 3: Apply setting compound as your base. Mix your Durabond to a peanut-butter consistency (not too thick, not runny). Force it into the crack with a 4- or 6-inch putty knife, overfilling slightly. Let it cure completely. With Durabond 90, that’s at least 90 minutes, but I let it go 2-3 hours to be safe.
Step 4: Apply mesh tape. Once the base coat is firm, embed fiberglass mesh tape centered over the crack. Press it firmly into position.
Step 5: Skim over the tape with all-purpose compound. Using a wider knife (8 or 10 inches), skim a thin coat of pre-mixed all-purpose compound over the tape, feathering it out well beyond the tape edges. Let it dry fully, which means overnight in most conditions.
Step 6: Sand, prime, repeat if needed. Sand lightly with 120-grit, prime the repair with a PVA primer (like Gardz or Zinsser Gardz Problem Surface Sealer), and assess. Most repairs need one more thin skim coat. PVA primer is non-negotiable here because it seals the porous compound and prevents the flat, sucked-out look you get when you paint directly over bare compound.
Step 7: Final sanding and paint. Once your last coat is dry, sand with 150-grit, prime again, and paint. The repair should be invisible.
Scenario 1: Living room in a 1952 ranch house with a 3-inch medium crack beside a window, previously patched twice with spackling that kept returning. Opened crack to V-shape, applied Durabond base, mesh tape, two skim coats, PVA primer. Repainted. As of 14 months later, zero cracking. Total material cost: under $30.
Scenario 2: Kitchen in a 1930s bungalow with a network of hairline cracks (often called “map cracking” or crazing) across an entire wall section. Individual crack filling wasn’t practical. Applied a skim coat of all-purpose compound over the entire wall section after priming with Gardz, sanded, then painted. Covered all hairlines, no individual crack work needed. Labor: about 4 hours including drying time. Total cost including materials and a quart of Gardz: around $55.
The Priming Step That Almost Nobody Talks About
I want to spend a minute on this because it is genuinely the most skipped and most costly mistake in plaster repair.
Joint compound and plaster repair material are extremely porous. When you paint over them without priming, the paint absorbs unevenly and the repaired area shows through as a flat or shiny spot, even if the texture is perfectly matched. Pros call this “flashing.” It’s maddening because it doesn’t show up until the paint is dry, and sometimes not until the second coat.
The fix is PVA primer applied specifically to the repaired area before your final paint coat. Gardz by Zinsser is my go-to because it also consolidates and seals soft or damaged plaster surfaces. A quart runs about $18-22 and goes a long way.
If you’re painting the entire wall (which I’d recommend), you can prime the whole thing. But at minimum, spot-prime every repair. Let it dry per the label, then paint. The flashing problem will disappear.
When to Call a Pro
I’ll be honest, most plaster crack repairs are genuinely DIY-able if you’re willing to take your time and follow the process above. The setting compound and mesh tape approach is how professional plasterers have been doing it for decades. It’s not mysterious.
Call a professional when:
- The plaster is hollow behind the crack over a significant area (more than a square foot or two).
- You’re seeing cracks reappear in the same place within 6 months despite proper repair, especially diagonal ones near structural openings.
- You need to match a decorative textured plaster (Venetian plaster, patterned relief work), because matching texture is a skill that takes real practice.
- The crack is part of a larger moisture problem, where you see staining, bubbling, or efflorescence around it.
Plastering work runs roughly $50-90 per hour for a skilled tradesperson in most U.S. markets as of this year. A small crack repair done by a pro might be a minimum call of $150-250. For complex repairs or full-room skim coating, budget $3-8 per square foot depending on your region.
Scenario 3: A homeowner in suburban Chicago DIY’d crack repairs on 6 medium cracks in an older home before listing it. Material costs came to $42. A contractor quoted $600 for the same work. Repairs held through sale inspection with no issues flagged. That’s not an argument against hiring out, it’s just an honest look at what the gap looks like.
Sources
- Durabond Setting-Type Compound Technical Data Sheet, DAP Products Inc.: specifications, working times, and application guidance for setting compounds used in plaster and drywall repair.
- Zinsser Gardz Problem Surface Sealer product documentation, Rust-Oleum Corporation: application guidelines for sealing porous and damaged plaster surfaces prior to painting.
- Old-House Journal, “Patching and Repairing Plaster” (archived reference): practitioner guidance on traditional plaster repair techniques in historic homes.
- National Park Service Preservation Brief #21, “Repairing Historic Flat Plaster, Walls and Ceilings”: detailed technical guidance on plaster composition, failure modes, and repair approaches for pre-WWII construction.
- Fine Homebuilding, various issues: contractor-level technique documentation for plaster repair and finishing in residential renovation contexts.
Photo: Monstera Production via Pexels





