 Kim Reeves
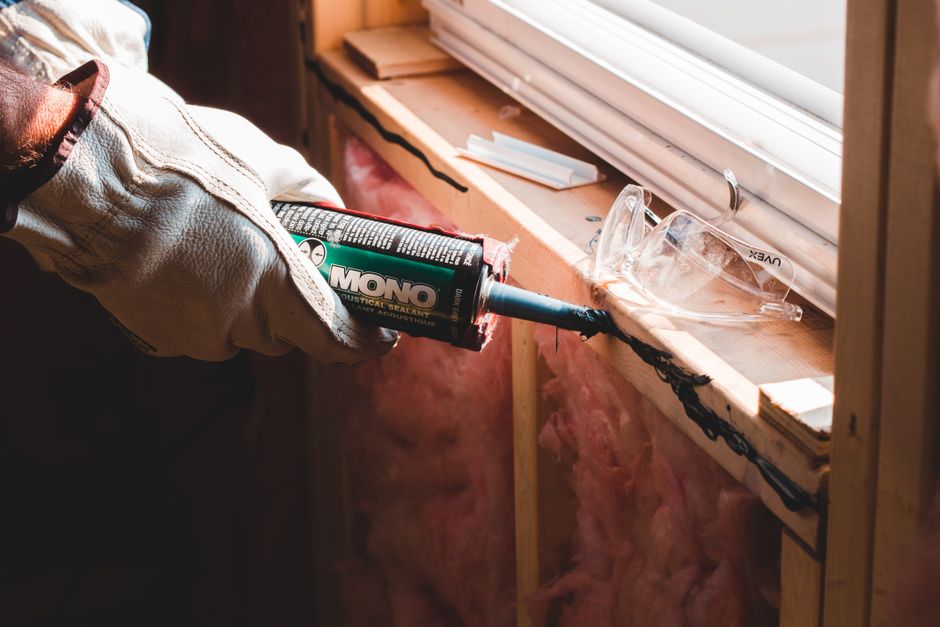
Thirty percent. That’s the share of your home’s heating and cooling energy that escapes through gaps around doors and windows, according to the U.S. Department of Energy. Not through walls. Not through your roof. Through cracks you could fix in a Saturday afternoon with materials that cost less than a dinner out.
You might be wondering whether it’s actually that dramatic. I had the same skepticism the first time a blower door test revealed what was happening in a 1987 ranch home I was rehabbing in western Pennsylvania. The technician ran the fan, and you could hold your hand near the bottom of every exterior door and feel a breeze. The homeowners had been heating the porch, basically. Three hours and $94 in weatherstripping later, their HVAC runtime dropped noticeably within the first billing cycle.
Here’s what I tell people: weatherstripping is the single highest return-on-investment home improvement you can do. Not new windows. Not a smart thermostat. Weatherstripping. The math is almost embarrassingly good once you know what you’re looking for.
- The DOE estimates air leaks waste 25-30% of heating/cooling energy in a typical home.
- Most exterior doors need full replacement weatherstripping every 5-7 years; windows, 7-10.
- Total materials for a single door run $15-$45; a full house job rarely exceeds $200.
- V-strip (tension seal) outperforms foam tape on high-traffic doors by lasting 3-5x longer.
- Payback period on a whole-house weatherstripping project is typically under 12 months.
What You’re Actually Losing (And Where)
The Lawrence Berkeley National Laboratory has been tracking residential air infiltration for decades. Their data shows the average American home has the equivalent of a 14-square-inch hole in it from all the combined gaps and cracks. That’s roughly the size of a brick. For context, the Energy Information Administration’s Residential Energy Consumption Survey found that space heating and cooling account for about 43% of household energy bills. So you’re hemorrhaging nearly a third of nearly half your energy bill through gaps a tube of foam and some metal strips could fix.
The worst offenders, in my experience, are almost always the same: the bottom of the front door (door sweeps compress and fail silently), the sides of older double-hung windows, attic hatches (wildly neglected), and sliding glass doors. Pet doors are their own disaster category, but that’s a whole separate article.
One thing most DIY guides won’t tell you: the seal you’re checking for isn’t just about wind. In humid climates like the Gulf Coast or Pacific Northwest, air infiltration brings moisture, which feeds mold. The energy savings matter, but the moisture control matters just as much.
Choosing the Right Material
This is where most homeowners, and honestly some contractors, get it wrong. I defaulted to foam tape for years because it’s cheap and fast. Then I started tracking callbacks. Foam tape on an exterior door that opens and closes ten times a day compresses within a year. Sometimes faster.
Here’s the breakdown on the main types, because the wrong choice can mean doing this job twice:
| Type | Best Use | Avg. Cost (per 10 ft) | Durability | DIY Ease |
|---|---|---|---|---|
| Foam tape (open-cell) | Low-traffic windows, attic hatches | $3-$6 | 1-3 years | Very easy |
| EPDM rubber (closed-cell) | Exterior doors, garage doors | $8-$14 | 5-10 years | Easy |
| V-strip / tension seal (vinyl or metal) | Door sides, double-hung windows | $6-$12 | 7-15 years | Moderate |
| Door sweep (automatic) | Door bottoms | $18-$45 each | 5-8 years | Moderate |
| Felt | Interior doors only | $2-$5 | 1-2 years | Very easy |
| Magnetic strip | Metal-framed doors, some windows | $12-$20 | 8-12 years | Moderate |
V-strip is the one product I’d push hard for anyone doing a front or back door. It’s the springy folded strip that tucks into the channel between the door stop and the jamb. It’s nearly invisible when installed, doesn’t compress the way foam does, and when I’ve pulled it out of doors after a decade, it still had meaningful spring to it. 3M makes a decent vinyl version; the Frost King V38H is probably the most widely available, running about $7 for 17 feet at most hardware stores. For the door bottom, an automatic door sweep (the kind that rises slightly when the door opens, then drops to seal when it closes) is worth the extra $12-$15 over a basic sweep. You’ll stop sweeping debris through it every time the door opens.
How to Actually Do This
The whole job on one door takes about 45 minutes if you’ve never done it before. Maybe 25 minutes by your third door.
Start with the diagnosis. Close the door and run a piece of paper around the frame. If it slides freely anywhere without resistance, that’s your gap. At night, have someone stand outside with a flashlight pointed at the seam while you look from inside in a dark room. You’ll see light wherever weatherstripping has failed.
Remove the old weatherstripping completely. This is important: don’t layer new material over old. The door has tolerances, and stacking adds thickness that can prevent the latch from catching or cause the door to bind. Clean the channel with a damp cloth and let it dry.
For V-strip on door sides: cut strips to fit each jamb edge (top and both sides), fold them so the open side of the V faces toward the interior, and slide or nail them into the channel between the door stop and jamb. The strip flexes inward as the door closes, creating a seal. Don’t stretch it tight before fastening. I made this mistake my first time and the strip pulled away from the jamb within a month.
For the door sweep: hold it against the door bottom with the door closed, mark where it contacts the threshold, and set it so it just grazes the threshold without dragging. Dragging means it’ll tear loose. A 1/16-inch contact is enough.
A real outcome from a project last year: a client in Minneapolis with a 1960s split-level had four exterior doors and eleven operable windows with completely failed weatherstripping. Materials totaled $187. We spent about four hours doing all of it. Her next heating bill (November, so legitimate baseline) came in at $34 less than the same month the prior year, and the following month was $41 less. She’ll have paid back the materials cost by late fall of this year.
The Windows Situation
Windows are more variable than doors, and I want to be honest that the savings math gets less clean here. A new double-pane window is often not justified by energy savings alone, even over ten years. But re-weatherstripping an existing window? Almost always worth it.
For double-hung windows, V-strip goes into the channels where the sashes slide. For casement windows, EPDM rubber foam tape on the compression seals does a reasonable job. For the most stubborn air leaks around older single-pane windows, rope caulk (the kind that looks like gray putty you press into the crack) is a seasonal option that’s completely removable in spring. It runs about $3 per window and is genuinely underrated for winter performance.
As of August 2026, energy costs in most of the U.S. are running meaningfully higher than the averages from five years ago, which makes the payback window on this kind of work shorter than it used to be. The EIA’s most recent residential survey puts the average household electricity spend at about $143 per month. Shaving 10-15% off that through air sealing and weatherstripping alone is a legitimate outcome, not a marketing claim.
When to Call Someone
Most of this is genuinely DIY-able. The exception is if you’re also dealing with rotted door frames, out-of-plumb doors that don’t hang correctly, or serious window sash issues. Weatherstripping won’t compensate for a door that doesn’t close squarely. If the door is binding, dropping, or has visible frame damage, that’s a carpenter problem first.
A blower door test from an energy auditor (typically $250-$450 for a full home audit) will show you exactly where your worst infiltration points are, which matters if you’re trying to prioritize a bigger air-sealing project. Many utility companies currently offer rebates that reduce or cover this cost entirely. Worth calling your utility to ask.
Sources
- U.S. Department of Energy, Building Technologies Office: energy.gov/energysaver/weatherstripping , air leakage estimates and product guidance
- Lawrence Berkeley National Laboratory, “Residential Air Leakage Database”: long-term infiltration data for U.S. housing stock
- U.S. Energy Information Administration, Residential Energy Consumption Survey (RECS): household energy expenditure breakdowns by end use
- ENERGY STAR Program, “Sealing Air Leaks” technical guide: field-tested infiltration reduction estimates
- Oak Ridge National Laboratory, “Measured Air Leakage Performance of Weatherstrips”: durability and performance testing data for common weatherstripping materials
Photo: Wallace Silva via Pexels